Spring Security 커스터마이징하기
스프링 시큐리티에서 기본으로 제공하는 것들은 정말 기본만 제공하기 때문에 커스터마이징이 거의 필수적이다.
그래서 아래와 같이 커스터마이징 해보려고 한다.
1. 로그인 화면 2. 회원 가입 3. 에러 메세지 4. 접근 권한 에러 페이지 5. 패스워드 암호화 6. 로그인 횟수 초과 시 계정 잠금 7. Remember-Me로 정보 저장 8. 관리자 접근 페이지 |
Spring Security를 처음 접해보았는데 엄청난 삽질 중이다..
기본적으로 제공하는 로그인 틀을 사용하기에는 너무 별로고 여기저기 참고하고 싶어서 찾아봤는데 블로그마다 방법이 다 달라서 왜그런가 했더니 커스터마이징 때문이었다.
그래서 그냥 여러군데 참고하면서 에러뜨면 고치고, 하고싶은 대로 구현했다.
시큐리티로 구현하지 않았으면 정말 복잡했을 것 같아서 편한 건 알겠는데, 아직 생소해서 설명에 틀린 부분이 존재할 수도 있다.
[참고한 곳들]
https://to-dy.tistory.com/72?category=720806
0. Gradle 추가하기
compile group: 'org.mybatis.spring.boot', name: 'mybatis-spring-boot-starter', version: '1.1.1'
1. 데이터베이스 만들기
정말 기본적인 정보만 넣고 시작했다.
CREATE TABLE `user` (
   `username` VARCHAR(20) NULL DEFAULT NULL,
   `password` VARCHAR(500) NULL DEFAULT NULL,
   `isAccountNonExpired` TINYINT(1) NULL DEFAULT NULL,
   `isAccountNonLocked` TINYINT(1) NULL DEFAULT NULL,
   `isCredentialsNonExpired` TINYINT(1) NULL DEFAULT NULL,
   `isEnabled` TINYINT(1) NULL DEFAULT NULL
)ENGINE=InnoDB DEFAULT CHARSET=utf8;

CREATE TABLE `authority` (
   `username` VARCHAR(20) NULL DEFAULT NULL,
   `authority` VARCHAR(20) NULL DEFAULT NULL
)ENGINE=InnoDB DEFAULT CHARSET=utf8;
2. Vo 작성
User, UserDetail 둘 중 하나 상속받는다. DB랑 맞춰주기.
package com.example.demo.board.vo;

import java.util.Collection;

import org.springframework.boot.autoconfigure.security.SecurityProperties.User;
import org.springframework.security.core.GrantedAuthority;
import org.springframework.security.core.userdetails.UserDetails;

public class Member implements UserDetails {
    private static final long serialVersionUID = 1L;

    private String username;
    private String password;
    private boolean isAccountNonExpired;
    private boolean isAccountNonLocked;
    private boolean isCredentialsNonExpired;
    private boolean isEnabled;
    private Collection<? extends GrantedAuthority> authorities;

    public String getUsername() {
        return username;
    }

    public void setUsername(String username) {
        this.username = username;
    }

    public String getPassword() {
        return password;
    }

    public void setPassword(String password) {
        this.password = password;
    }

    public boolean isAccountNonExpired() {
        return isAccountNonExpired;
    }

    public void setAccountNonExpired(boolean isAccountNonExpired) {
        this.isAccountNonExpired = isAccountNonExpired;
    }

    public boolean isAccountNonLocked() {
        return isAccountNonLocked;
    }

    public void setAccountNonLocked(boolean isAccountNonLocked) {
        this.isAccountNonLocked = isAccountNonLocked;
    }

    public boolean isCredentialsNonExpired() {
        return isCredentialsNonExpired;
    }

    public void setCredentialsNonExpired(boolean isCredentialsNonExpired) {
        this.isCredentialsNonExpired = isCredentialsNonExpired;
    }

    public boolean isEnabled() {
        return isEnabled;
    }

    public void setEnabled(boolean isEnabled) {
        this.isEnabled = isEnabled;
    }

    public Collection<? extends GrantedAuthority> getAuthorities() {
        return authorities;
    }

    public void setAuthorities(Collection<? extends GrantedAuthority> authorities) {
        this.authorities = authorities;
    }
}
package com.example.demo.board.vo;
import org.springframework.security.core.userdetails.User;
public class SecurityMember extends User {
private static final long serialVersionUID = 1L;
public SecurityMember(Member member) {
super(member.getUsername(), member.getPassword(), member.getAuthorities());
}
}
3. SecurityCofig 만들기
여기서 제일 헤맴...
login, join, joinForm, resources에 대해서는 권한을 요구하지 않도록 해야한다.
그래야 회원가입이나 로그인을 할 수 있기 때문에.
그 외에 경로에 대해서는 .antMatchers("**").authenticated() 추가하여 로그인 없이는 접속하지 못하도록 했다.
.formLogin() 여기서 로그인 커스터마이징하기.
비밀번호 암호화는 BCryptPasswordEncoder를 사용했다.
package com.example.demo.board.config;

import org.springframework.beans.factory.annotation.Autowired;
import org.springframework.context.annotation.Bean;
import org.springframework.context.annotation.Configuration;
import org.springframework.security.config.annotation.authentication.builders.AuthenticationManagerBuilder;
import org.springframework.security.config.annotation.web.builders.HttpSecurity;
import org.springframework.security.config.annotation.web.configuration.EnableWebSecurity;
import org.springframework.security.config.annotation.web.configuration.WebSecurityConfigurerAdapter;
import org.springframework.security.crypto.bcrypt.BCryptPasswordEncoder;
import org.springframework.security.crypto.password.PasswordEncoder;

import com.example.demo.board.service.CustomUserDetailsService;

@EnableWebSecurity
@Configuration
public class SecurityConfig extends WebSecurityConfigurerAdapter {

    @Autowired CustomUserDetailsService customUserDetailsService;

    @Override
    protected void configure(HttpSecurity http) throws Exception {
		http
        .csrf().disable()
        .authorizeRequests()
        	.antMatchers("/login", "/join", "/joinForm", "/resources/**").permitAll()
        	.antMatchers("**").authenticated()
        .and()
        .formLogin()
            .loginPage("/login") //커스터마이징하기
        	.usernameParameter("username")
        	.passwordParameter("password")
        	.defaultSuccessUrl("/list") //성공 시 보낼 url
        .and()
        .logout()
	        .logoutSuccessUrl("/login") //로그아웃이 처리됐을 때 넘어갈 곳 설정
    }

	/* 비밀번호 암호화 */
    @Override
    protected void configure(AuthenticationManagerBuilder auth) throws Exception {
        auth
        	.userDetailsService(customUserDetailsService).passwordEncoder(passwordEncoder());
    }
    @Bean
    public PasswordEncoder passwordEncoder() {
    	return new BCryptPasswordEncoder();
    }
}
4. 컨트롤러 작성
회원가입 로그아웃 빼고 일단 로그인만 넣어보았다.
/login으로 들어오면 loginForm.jsp로 리턴하고, jsp에 action을 /login으로 지정했다. 서비스는 아직 없어도 됨.
package com.example.demo.board.controller;

import javax.servlet.http.HttpServletRequest;
import javax.servlet.http.HttpServletResponse;

import org.springframework.beans.factory.annotation.Autowired;
import org.springframework.security.core.Authentication;
import org.springframework.security.core.context.SecurityContextHolder;
import org.springframework.security.web.authentication.logout.SecurityContextLogoutHandler;
import org.springframework.stereotype.Controller;
import org.springframework.web.bind.annotation.RequestMapping;
import org.springframework.web.bind.annotation.RequestMethod;

import com.example.demo.board.service.CustomUserDetailsService;
import com.example.demo.board.vo.Member;

@Controller
public class UserController {

	@Autowired CustomUserDetailsService customUserDetailsService;

	/* 로그인 커스터마이징 */
	@RequestMapping(value="/login")
    public String RedirectToLoginForm() throws Exception {
       return "/loginForm";
    }
}
5. 로그인 폼 만들기
SPRING_SECURITY_LAST_EXCEPTION 이 부분은 에러 메세지를 출력하기 위해 사용한다.
만약 로그인 시에 비밀번호가 맞지 않는다면 오류 메세지를 출력하는 앨리먼트를 추가시킨다.
<%@ taglib uri="http://java.sun.com/jsp/jstl/core" prefix="c"%>
<%-- <%@ taglib uri="http://www.springframework.org/security/tags" prefix="sec"%> --%>
<%@ page language="java" contentType="text/html; charset=UTF-8" pageEncoding="UTF-8"%>
<!DOCTYPE html>
<html lang="ko">
<head>
<meta charset="utf-8">
<meta http-equiv="X-UA-Compatible" content="IE=edge">
<meta name="viewport" content="width=device-width, initial-scale=1">
<!-- <meta id="_csrf" name="_csrf" content="${_csrf.token}" /> <meta id="_csrf_header" name="_csrf_header" content="${_csrf.headerName}" /> -->
<sec:csrfMetaTags />
<title>Spring Security</title>
<link href="https://maxcdn.bootstrapcdn.com/bootstrap/3.3.7/css/bootstrap.min.css" rel="stylesheet" integrity="sha384-BVYiiSIFeK1dGmJRAkycuHAHRg32OmUcww7on3RYdg4Va+PmSTsz/K68vbdEjh4u" crossorigin="anonymous">
</head>

<body>
	<%@ include file="bootstrap.jsp" %>
	<div class="container">
		<div class="page-header">
			<h1>Login Page <small>with Bootstrap</small></h1>
		</div>
		<div class="container-fluid">
			<form method="post" action="/login">
				<!-- <sec:csrfInput/> -->
				<div class="form-group">
					<label for="username">유저명</label>
					<input type="text" class="form-control" name="username" placeholder="username" required>
				</div>
				<div class="form-group">
					<label for="password">비밀번호</label>
					<input type="password" class="form-control" name="password" placeholder="Password" required>
				</div>

				<!-- 인증 실패 시 message 변수 값을 읽어와 화면에 출력 -->
				<!-- c:if 태그를 사용하여 해당 키가 비어있지 않으면(인증에 실패했으면) 세션을 통해 저장되어 있는 에러 메시지를 보여준다. -->
				<div class="text-center">
					<c:if test="${not empty SPRING_SECURITY_LAST_EXCEPTION}">
						<div class="alert alert-danger" role="alert">
						<span class="text-danger" id="failDiv">
							<p>Your login attempt was not successful due to <c:out value="${SPRING_SECURITY_LAST_EXCEPTION.message}" /></p>
							<input type="hidden" name="exceptionMsg" id="exceptionMsg" value="${SPRING_SECURITY_LAST_EXCEPTION.message}" >
						</span>
						</div>
						<c:remove var="SPRING_SECURITY_LAST_EXCEPTION" scope="session"/>
					</c:if>
				</div>
				<hr>
				<button type="submit" class="btn btn-default">로그인</button>
				<a class="btn btn-default" href="/joinForm">회원가입</a>
			</form>
		</div>
		<div class="container"></div>
	</div>
	<script src="https://ajax.googleapis.com/ajax/libs/jquery/1.12.4/jquery.min.js"></script>
	<script src="https://maxcdn.bootstrapcdn.com/bootstrap/3.3.7/js/bootstrap.min.js" integrity="sha384-Tc5IQib027qvyjSMfHjOMaLkfuWVxZxUPnCJA7l2mCWNIpG9mGCD8wGNIcPD7Txa" crossorigin="anonymous"></script>
</body>

</html>
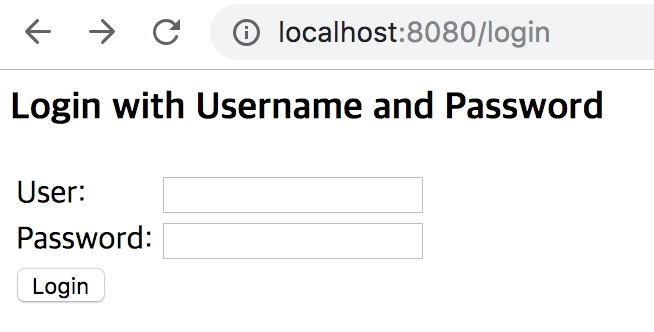
Spring Security 로그인 커스터마이징 완성!
아직 회원가입 기능이 없으니, 테스트해보고 싶다면 DB에 직접 데이터 넣은 후 로그인해보면 된다.
'ICT Intern > Spring Security' 카테고리의 다른 글
| [Spring] Spring Security 메세지 커스터마이징 (0) | 2019.04.11 |
|---|---|
| [Spring] Spring Security 기본 개념 정리 (0) | 2019.04.10 |
| [Spring] Thymeleaf 알아보기 (0) | 2019.04.09 |
| [Spring] Spring Security 암호화 (0) | 2019.04.09 |
| [Spring] Spring Security - Config 알아보기 (0) | 2019.04.02 |