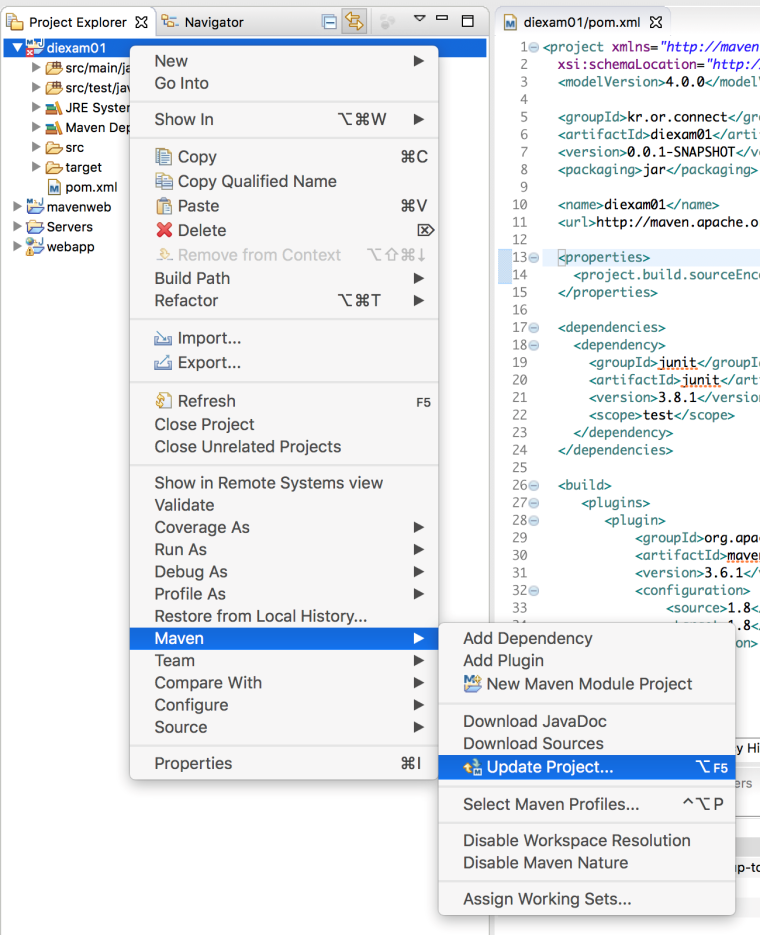
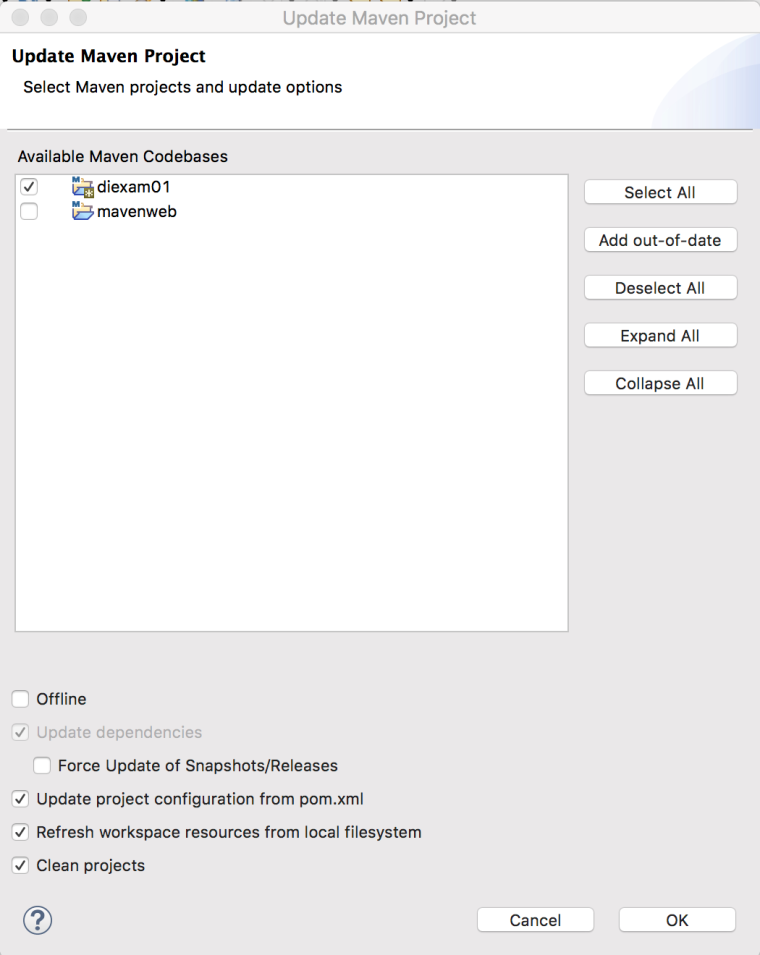
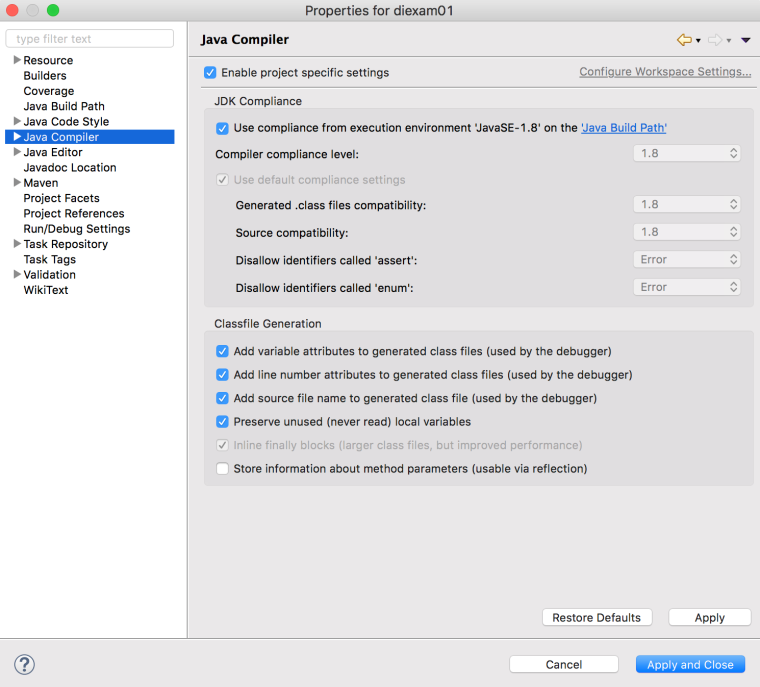
pom.xml에 JDK를 사용하기 위한 플러그인 설정을 추가한다.
1 2 3 4 5 6 7 8 9 10 11 12 13 14 15 16 17 18 19 20 21 22 23 24 25 26 27 28 29 30 31 32 33 34 35 36 37 38 39 40 41 42 | <project xmlns="http://maven.apache.org/POM/4.0.0" xmlns:xsi="http://www.w3.org/2001/XMLSchema-instance" xsi:schemaLocation="http://maven.apache.org/POM/4.0.0 http://maven.apache.org/xsd/maven-4.0.0.xsd"> <modelVersion>4.0.0</modelVersion> <groupId>kr.or.connect</groupId> <artifactId>diexam01</artifactId> <version>0.0.1-SNAPSHOT</version> <packaging>jar</packaging> <name>diexam01</name> <url>http://maven.apache.org</url> <properties> <project.build.sourceEncoding>UTF-8</project.build.sourceEncoding> </properties> <dependencies> <dependency> <groupId>junit</groupId> <artifactId>junit</artifactId> <version>3.8.1</version> <scope>test</scope> </dependency> </dependencies> -------------------------------------추가---------------------------------------------------- <build> <plugins> <plugin> <groupId>org.apache.maven.plugins</groupId> <artifactId>maven-compiler-plugin</artifactId> <version>3.6.1</version> <configuration> <source>1.8</source> <target>1.8</target> </configuration> </plugin> </plugins> </build> ---------------------------------------------------------------------------------------------- </project> | cs
|
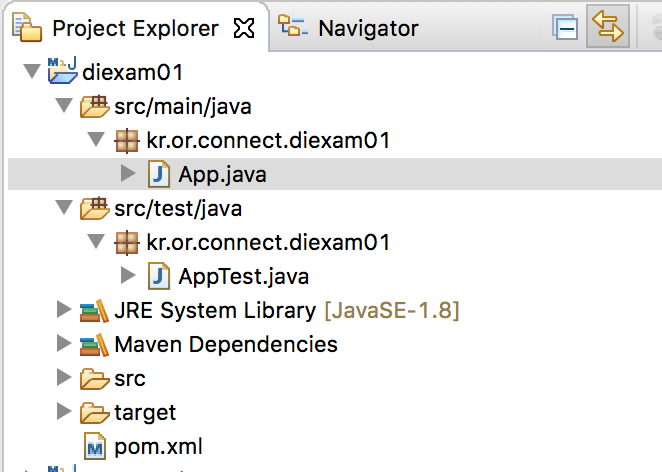
- App.java
| package kr.or.connect.diexam01; /** * Hello world! * */ public class App { public static void main( String[] args ) { System.out.println( "Hello World!" ); } } | cs |
- AppTest.java (단위 테스트를 할 수 있음)
1 2 3 4 5 6 7 8 9 10 11 12 13 14 15 16 17 18 19 20 21 22 23 24 25 26 27 28 29 30 31 32 33 34 35 36 37 38 | package kr.or.connect.diexam01; import junit.framework.Test; import junit.framework.TestCase; import junit.framework.TestSuite; /** * Unit test for simple App. */ public class AppTest extends TestCase { /** * Create the test case * * @param testName name of the test case */ public AppTest( String testName ) { super( testName ); } /** * @return the suite of tests being tested */ public static Test suite() { return new TestSuite( AppTest.class ); } /** * Rigourous Test :-) */ public void testApp() { assertTrue( true ); } } | cs |
AppTest.java 를 선택한 후 우측버튼을 클릭하고, Run As -> JUnit Test 메뉴를 선택한다.
* Bean 실습
UserBean.java
1 2 3 4 5 6 7 8 9 10 11 12 13 14 15 16 17 18 19 20 21 22 23 24 25 26 27 28 29 30 31 32 33 34 35 36 37 38 39 40 41 42 43 44 45 46 | package kr.or.connect.diexam01; //빈클래스 public class UserBean { //필드는 private private String name; private int age; private boolean male; //기본생성자를 반드시 가지고 있어야 한다. public UserBean() { }
public UserBean(String name, int age, boolean male) { this.name = name; this.age = age; this.male = male; } // setter, getter메소드는 프로퍼티라고 한다. public void setName(String name) { this.name = name; } public String getName() { return name; } public int getAge() { return age; } public void setAge(int age) { this.age = age; } public boolean isMale() { return male; } public void setMale(boolean male) { this.male = male; } } | cs |
- Spring Bean Factory를 이용하여 Bean객체 이용하기
1) pom.xml 파일을 다음과 같이 수정하기
1 2 3 4 5 6 7 8 9 10 11 12 13 14 15 16 17 18 19 20 21 22 23 24 25 26 27 28 29 30 31 32 33 34 35 36 37 38 39 40 41 42 43 44 45 46 47 48 | <project xmlns="http://maven.apache.org/POM/4.0.0" xmlns:xsi="http://www.w3.org/2001/XMLSchema-instance" xsi:schemaLocation="http://maven.apache.org/POM/4.0.0 http://maven.apache.org/xsd/maven-4.0.0.xsd"> <modelVersion>4.0.0</modelVersion> <groupId>kr.or.connect</groupId> <artifactId>diexam01</artifactId> <version>0.0.1-SNAPSHOT</version> <packaging>jar</packaging> <name>diexam01</name> <url>http://maven.apache.org</url> <properties> <!-- 여기에는 상수처럼 사용할 수 있는 것들이 들어감 --> <project.build.sourceEncoding>UTF-8</project.build.sourceEncoding> <spring.version> 4.3.14.RELEASE</spring.version> </properties> <dependencies> <!-- Spring 관련 --> <dependency> <groupId>org.springframework</groupId> <artifactId>spring-context</artifactId> <version>${spring.version}</version> </dependency> <dependency> <groupId>junit</groupId> <artifactId>junit</artifactId> <version>3.8.1</version> <scope>test</scope> </dependency> </dependencies> <build> <plugins> <plugin> <groupId>org.apache.maven.plugins</groupId> <artifactId>maven-compiler-plugin</artifactId> <version>3.6.1</version> <configuration> <source>1.8</source> <target>1.8</target> </configuration> </plugin> </plugins> </build> </project> | cs |
2) 추가된 라이브러리 확인하기
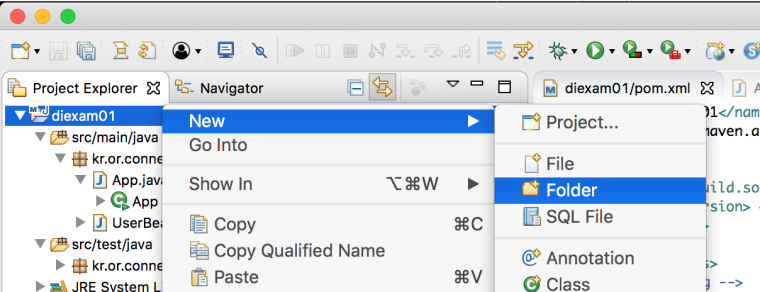
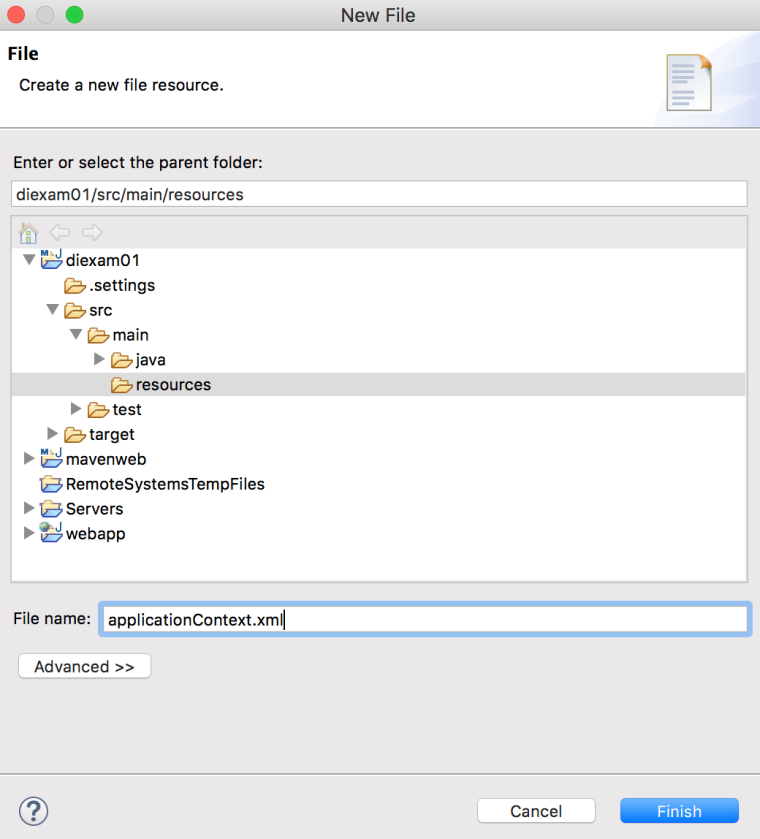
4) resources 소스 폴더에 xml 파일을 작성
applicationContext.xml
| <?xml version="1.0" encoding="UTF-8"?> <beans xmlns="http://www.springframework.org/schema/beans" xmlns:xsi="http://www.w3.org/2001/XMLSchema-instance" xsi:schemaLocation="http://www.springframework.org/schema/beans http://www.springframework.org/schema/beans/spring-beans.xsd"> <bean id="userBean" class="kr.or.connect.diexam01.UserBean"></bean> | cs |
bean 태그를 하나 입력했는데, 위의 태그는 다음과 같은 의미를 가진다.
kr.or.connect.diexam01.UserBean userBean = new kr.or.connect.diexam01.UserBean();
- ApplicationContext를 이용해서 설정파일을 읽어들여 실행하기
프로젝트를 시작시킬 시작점을 만드는 것이다.
ApplicationContextExam01
1 2 3 4 5 6 7 8 9 10 11 12 13 14 15 16 17 18 19 20 21 22 23 | package kr.or.connect.diexam01; import org.springframework.context.ApplicationContext; import org.springframework.context.support.ClassPathXmlApplicationContext; public class ApplicationContextExam01 { public static void main(String[] args) { /* applicationContext.xml에 정보가 있다고 알리는 것 */ ApplicationContext ac = new ClassPathXmlApplicationContext( "classpath:applicationContext.xml"); System.out.println("초기화 완료."); /* .xml에서 id가 userBean인 것을 찾아서 클래스를 찾아내고 생성해준다. */ UserBean userBean = (UserBean)ac.getBean("userBean"); userBean.setName("kim"); System.out.println(userBean.getName()); /* kim이 출력된다. */ UserBean userBean2 = (UserBean)ac.getBean("userBean"); if(userBean == userBean2) { System.out.println("같은 인스턴스이다."); /* 같은 인스턴스라고 출력 (싱글턴 패턴을 이용하기 때문에) */ } } } | cs
|
* DI 확인 실습
DI 즉 의존성 주입을 확인하기 위해 Car와 Engine이라는 클래스 2개를 생성한다.
Engine.java
package kr.or.connect.diexam01;

public class Engine {
	public Engine() {
		System.out.println("Engine 생성자");
	}

	public void exec() {
		System.out.println("엔진이 동작합니다.");
	}
}
Car.java
package kr.or.connect.diexam01;

public class Car {
	Engine v8;

	public Car() {
		System.out.println("Car 생성자");
	}

	public void setEngine(Engine e) {
		this.v8 = e;
	}

	public void run() {
		System.out.println("엔진을 이용하여 달립니다.");
		v8.exec();
	}
}
위의 Car 클래스가 제대로 동작하도록 하려면 보통 아래과 같은 코드가 작성되야 한다.
하지만 IoC를 이용할 것이기 때문에 아래와 같은 코드는 필요가 없어진다. Spring IoC 컨테이너가 만들어 주기 때문이다.
Engine e = new Engine();
Car c = new Car();
c.setEngine( e );
c.run();
대신, Spring IoC 컨테이너에게 맡기기 위해 applicationContext.xml 설정파일에 다음과 같은 코드를 추가로 입력한다.
e, car를 추가로 등록해주었다. property 앨리먼트는 ref에 id가 e로 선언된 인스턴스를 setEngine()메서드에 파라미터로 전달해 달라고 나타내는 것이다.
<bean id="e" class="kr.or.connect.diexam01.Engine"></bean>
<bean id="car" class="kr.or.connect.diexam01.Car">
	<property name="engine" ref="e"></property>
</bean>
위의 XML설정은 다음과 같은 의미를 가진다.
Engine e = new Engine();
Car c = new Car();
c.setEngine( e );
이번엔 위의 설정 파일을 읽어들여 실행하는 ApplicationContextExam02.java를 작성
package kr.or.connect.diexam01;

import org.springframework.context.ApplicationContext;
import org.springframework.context.support.ClassPathXmlApplicationContext;

public class ApplicationContextExam02 {

	public static void main(String[] args) {
		ApplicationContext ac = new ClassPathXmlApplicationContext(
				"classpath:applicationContext.xml");

		Car car = (Car)ac.getBean("car");
		car.run();

	}
}
Engine이라는 클래스는 실행 클래스에 등장하지 않는 것을 볼 수 있다. 사용자는 Car 클래스만 알고있으면 되는 것!
=> 이것이 의존성 주입
다음과 같이 실행된 것을 알 수 있다.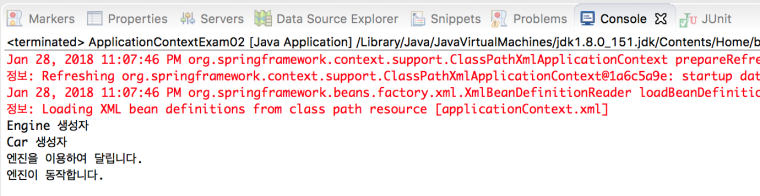
Spring 버전이 업데이터 되면서 xml을 사용하는 방법보다는 어노테이션과 자바 Config를 사용하는 방법이 더 많이 사용되고 있다. 일일이 빈을 등록해야 하는 불편함이 존재하기 때문이다.
다음 게시글을 참고해보자.